documentation
Setting up ThingPark Community Platform (Network Server) and TagoIO
Connect Your Gateway to the Internet
Execute the following steps so that your gateway can access the internet to reach the ThingPark Community Platform (TPCP).
- Plug in your gateway to a power source.
- Connect your gateway to an Ethernet network where it can get an automatic IP address from a DHCP server and access the Internet. If your gateway is behind a corporate firewall, make sure the firewall does not block the following ports towards the Internet:
- FTP (TCP port 21)
- NTP (UDP port 123)
- IPsec (UDP ports 4500 and 500)
All gateway connections are in the gateway-to-Cloud direction and support NAT traversal. Therefore, no port forwarding is required.
Set up the ThingPark Community Account
Actility’s ThingPark Community provides access to its ThingPark Enterprise (TPE) platform, which allows developers to experience the ThingPark platform. This platform is already used by many networks around the world, from large nationwide public networks to small private networks. Anyone can connect up to three gateways and 50 devices to TPCP free of charge for non-commercial use.
The platform is always kept up-to-date with the latest ThingPark release, as soon as automated QA testing has been completed from R&D. It is used as a first field-test platform as part of the release cycle. Therefore, it may be stopped or upgraded at any time, with a prior notification of 48 hours. There is no service level agreement for this platform.
Create a ThingPark Community Account
To create an account on the ThingPark Community, please visit community.thingpark.org and click the Sign Up button. The account you create can be used for accessing both the portal and the platform, which is accessible at community.thingpark.io/tpe.
Add the Gateway to ThingPark
In this section you learn how to create your gateway on ThingPark so it can be recognized by the platform and associated with your account.
- Open the ThingPark Community Portal.
- In the main menu (on the left), under Base Stations, select Create
- Select the gateway vendor, UfiSpace.
- Complete the Enter Your Base Station Information section of the form as follows:
- Model: Select the Enterprise V1.5.
- Name: Enter a name for your gateway, e.g. Base Station.
- LRR-UUID: Enter the LRR UUID which was emailed to you when you purchased the kit, e.g. 001558-46584254C0001BF9. The LRR UUID is also found on the paperwork supplied with the kit. You must have received the LRR UUID prior to continuing.
- RF Region: Select the region where your gateway is located and the channels it supports. Assuming you are using the gateway supplied in the kit, choose the following depending on your region:
- EU 863-870 region: select EU 863-870MHz (8 channels)
- US 915 region: whilst you can choose any of the channels, we recommend you select US 915MHz (16 channels: CH0-CH15). This channel results in a shorter join time than the other channels.
- IPsec (X.509) for base station to TPE connection: Set this to Enabled.
- Additional Information: Add any notes you need to associate with your gateway, or leave blank.
- Public key: Locate the Base Station Public Key which was emailed to you when you purchased the kit. Copy key (with or without the BEGIN/END lines) and paste it here.
-----BEGIN PUBLIC KEY-----
MIGfMA0GCSqGSib3DQEBAQUAA4GNADCBiQKBgQD1w1rNcTvFSgryEaIZ2egMLQ7ErAl
9JDPF1v0EnQ6Xluiz6Mc3hlsWzM303HQA3dAgRfSWDy7kHcAS8631uQIDAQAB
-----END PUBLIC KEY-----
Example of a Public Key
- In the Set Your Base Station Location section of the form, set Mode to Manual and enter the coordinates using latitude (Lat) and longitude (Long) or by clicking on the map.
- Click CREATE.
- The CONFIRMATION dialog box displays. Click VIEW THE BASE STATION to continue.
- The Base Station page displays. Scroll down to the STATUS section to view the status of your gateway.
- Wait approximately five minutes for your gateway to complete the initialization procedure and then refresh the page. When the gateway is active, the Connection field of the STATUS section will show ACTIVE. The LPWAN light on the gateway will be solid blue.
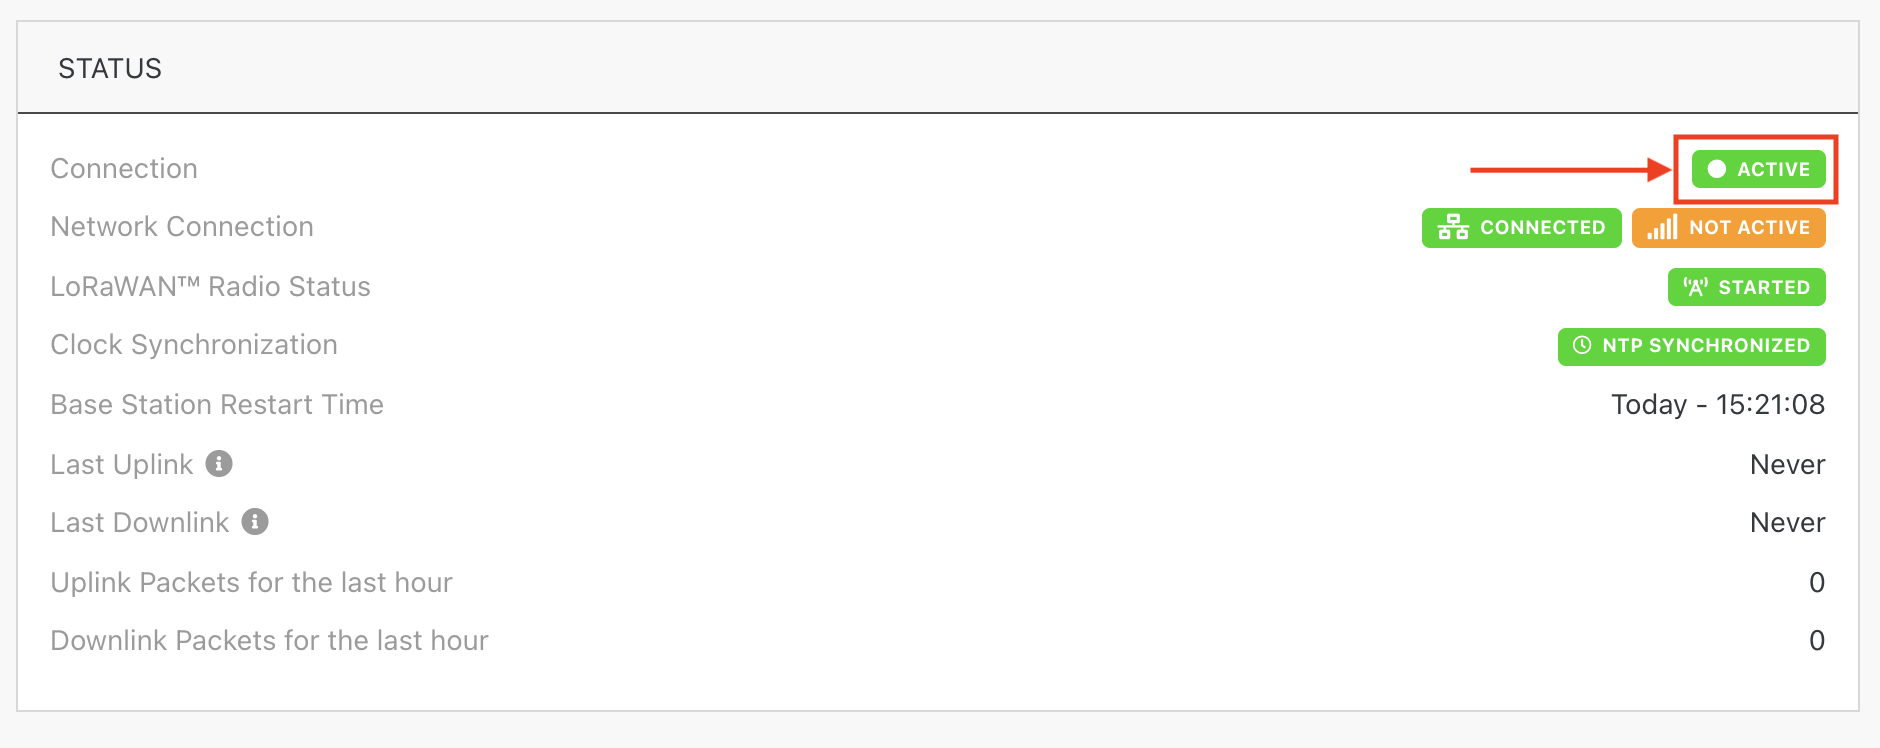
Gateway Status showing active
Note
It is normal for the Connection field of the STATUS section to show RADIO ERROR. Keep waiting or try refreshing the page.
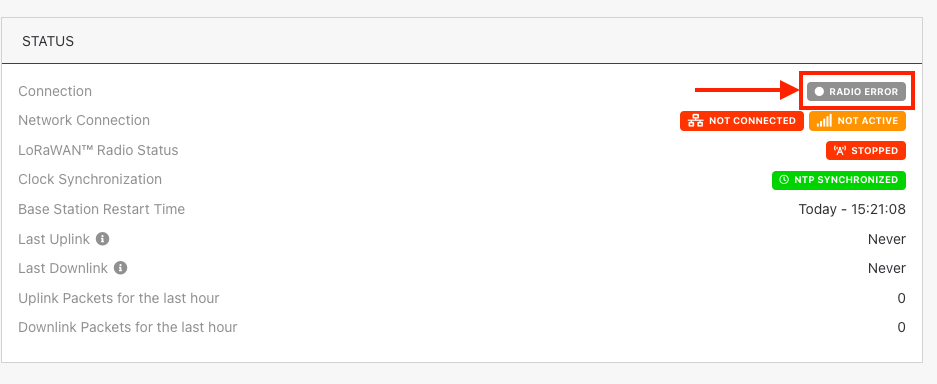
Gateway Status showing RADIO ERROR
Now your gateway is ready to send the uplink frames it demodulates to your ThingPark account and to accept the downlink frames sent from any application server or cloud via ThingPark to be transmitted over the air. You can see it listed when you click on List under Base Stations in the main menu.
Create a TagoIO Connection on ThingPark
Perform the following steps to create the TagoIO connection to the ThingPark service to allow tracking data to be routed from ThingPark to TagoIO.
- Open the ThingPark Community Portal.
- In the menu on the left, under Connections, select Create.
- Select the Basic HTTPS option.
- Complete the form as follows:
- Name: Enter TagoIO.
-
URL: Set to https://actility.middleware.tago.io/uplink?authorization=TEMP-AUTHORIZATION
Note
The final value of the authorization query parameter in the URL will be updated to one assigned by TagoIO. You use this TEMP-AUTHORIZATION value for now, and we will guide you to come back and replace it with the actual value later.
- Content Type: Select JSON.
- Tunnel Interface Authentication Key: This key has been randomly generated. Copy it and save it somewhere safe. This is referred to later as the
TTCP_CONNECTION_TUNNEL_INTERFACE_AUTHENTICATION_KEY. - Custom HTTP Headers: Leave this field empty.
- Additional Information: Add any notes you need to associate with your gateway, or leave empty.
- Click CREATE.
- The CONFIRMATION dialog box displays. Click VIEW THE CONNECTION to continue.
- The TagoIO connection page displays.
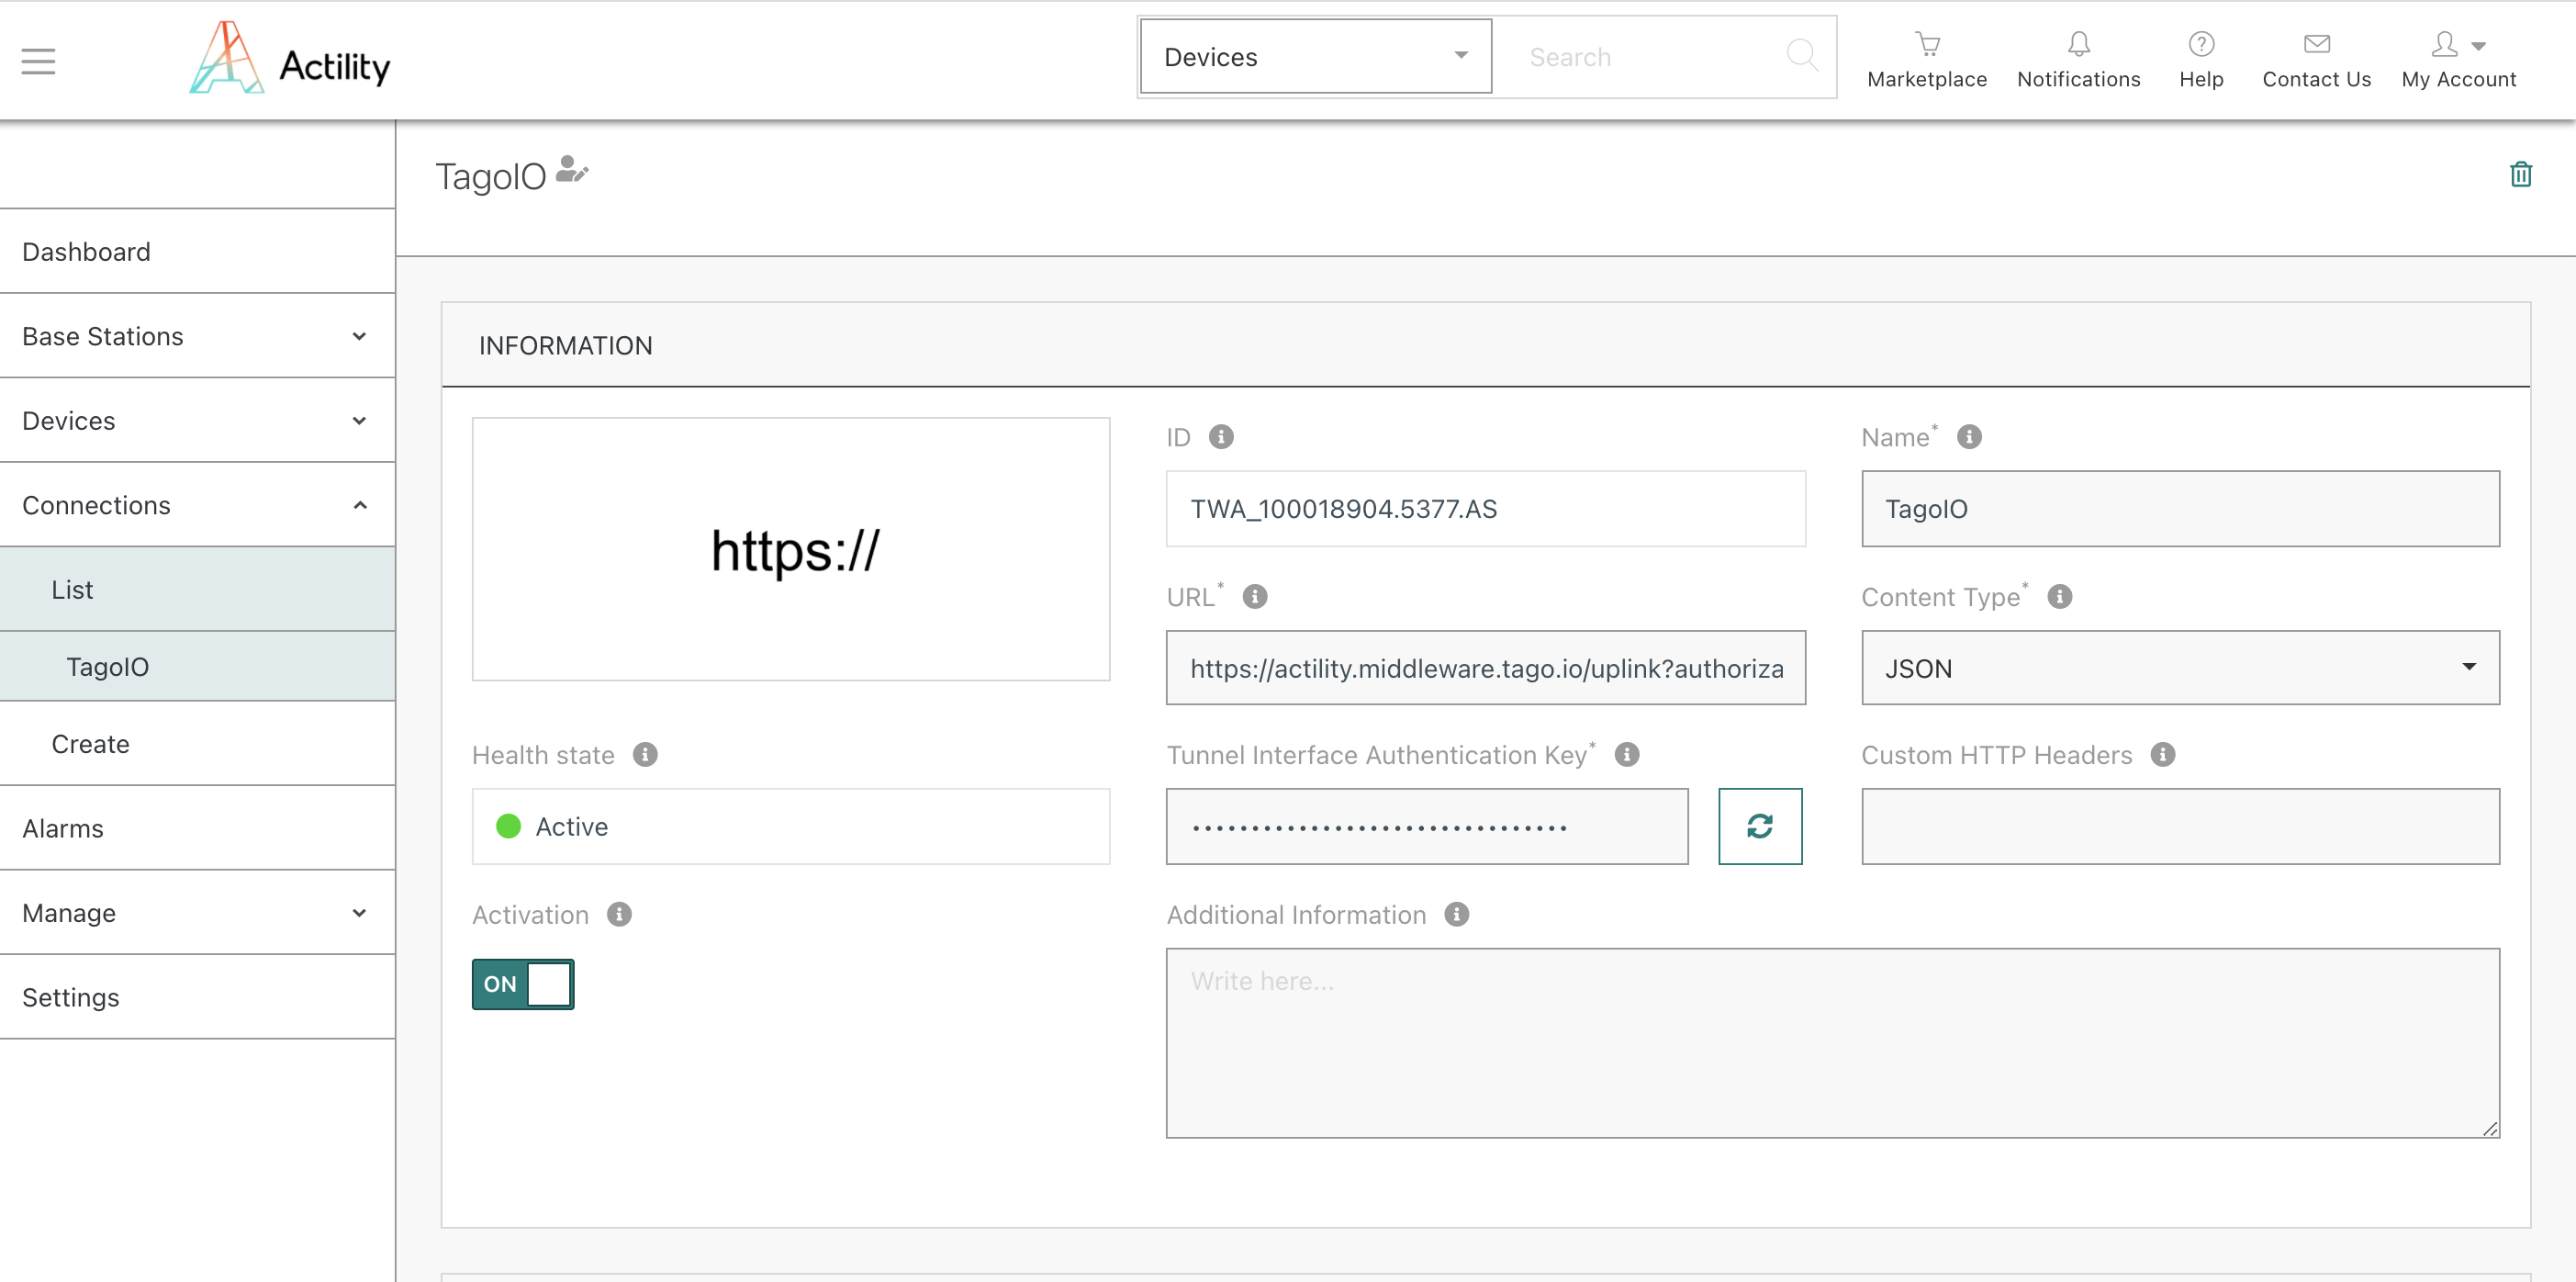
Connection page
The TagoIO connection is now ready to send and receive application payloads via the TPCP for the trackers you will be creating. You can see the connection listed when you click List under Connections in the main menu.
Add the LR1110 Based Devices to ThingPark
Complete the following steps for each LR1110 based device in your kit:
- Open the ThingPark Community Portal.
- At the main menu, under Devices, select Create.
- Select Generic as the device manufacturer.
- The CREATING A DEVICE form displays. Complete the Enter Your Device Information section of form as follows:
- Model: Enter the text LoRaWAN 1.0.3 revA - Class A. If you use the region EU868, choose the option that also shows eu868. If you use the region US915, choose the option that also shows us915. If you use the region AU915, choose the option that also shows au915.
- Name: Enter a name that you can use to distinguish your device.
- DevEUI: Enter the DevEUI supplied in your kit. This is also sent to you via email when you purchase the kit.
-
Activation mode: Select Over-the-Air Activation (OTAA) with external Join Server.
Note
The LR1110 based devices supplied in your Kit use the Semtech Join Server connected to ThingPark via ThingPark Exchange to activate.
-
JoinEUI (AppEUI): Enter the AppEUI (JoinEUI) supplied in your Kit.
Note
This value is an eight-byte, globally-unique value used to identify the Semtech Join Server which is associated with your tracker. This value is represented in hexadecimal format (i.e., 16 characters, such as F1E2D3C4B5A6F7E8).
- Owner token: Leave this field empty.
- Additional Information: Add any notes you need to associate with your device, or leave blank.
- Complete the Associate Your Device With Your Connections section of the form as follows:
- Connections: Select the TagoIO connection you just created.
- Complete the Set Your Device Location section of the form as follows:
- Mode: Select the No location option, since this will not be using a ThingPark-based location service.
- Leave Roaming set to OFF.
- If you have another device to create, check the Create another checkbox next to the CREATE button.
- Click CREATE.
- The device is displayed on the device page.
Now your tracker is ready to be used. You can see it listed when you click on the List option under Devices in the main menu.
Set up TagoIO
Creating your TagoIO Web Portal Account
From a web browser, go to https://admin.tago.io and create your free account.
Once you have created your account and confirmed your email, you will be redirected to the TagoIO Admin page. From there, you can see your account usage information. One important area to watch is the Usage Statistics section. This section shows you the number of services you are using in your applications.
![]()
TagoIO Usage Statistics section
Among other things, the Usage Statistics show how much data your devices are sending by the hour (Data Input), and how much data you can have stored at TagoIO (Data Records). You will receive notifications if you get close to or surpass the limits for your account, so be aware of that if you happen to stop receiving your data at TagoIO.
Linking the Application Server on ThingPark with TagoIO
In this section you learn how to set up ThingPark to redirect your sensor data to TagoIO, and to enable your TagoIO account to accept this data.
- Open TagoIO and log in to your TagoIO account.
- Select Devices in the sidebar on the left.
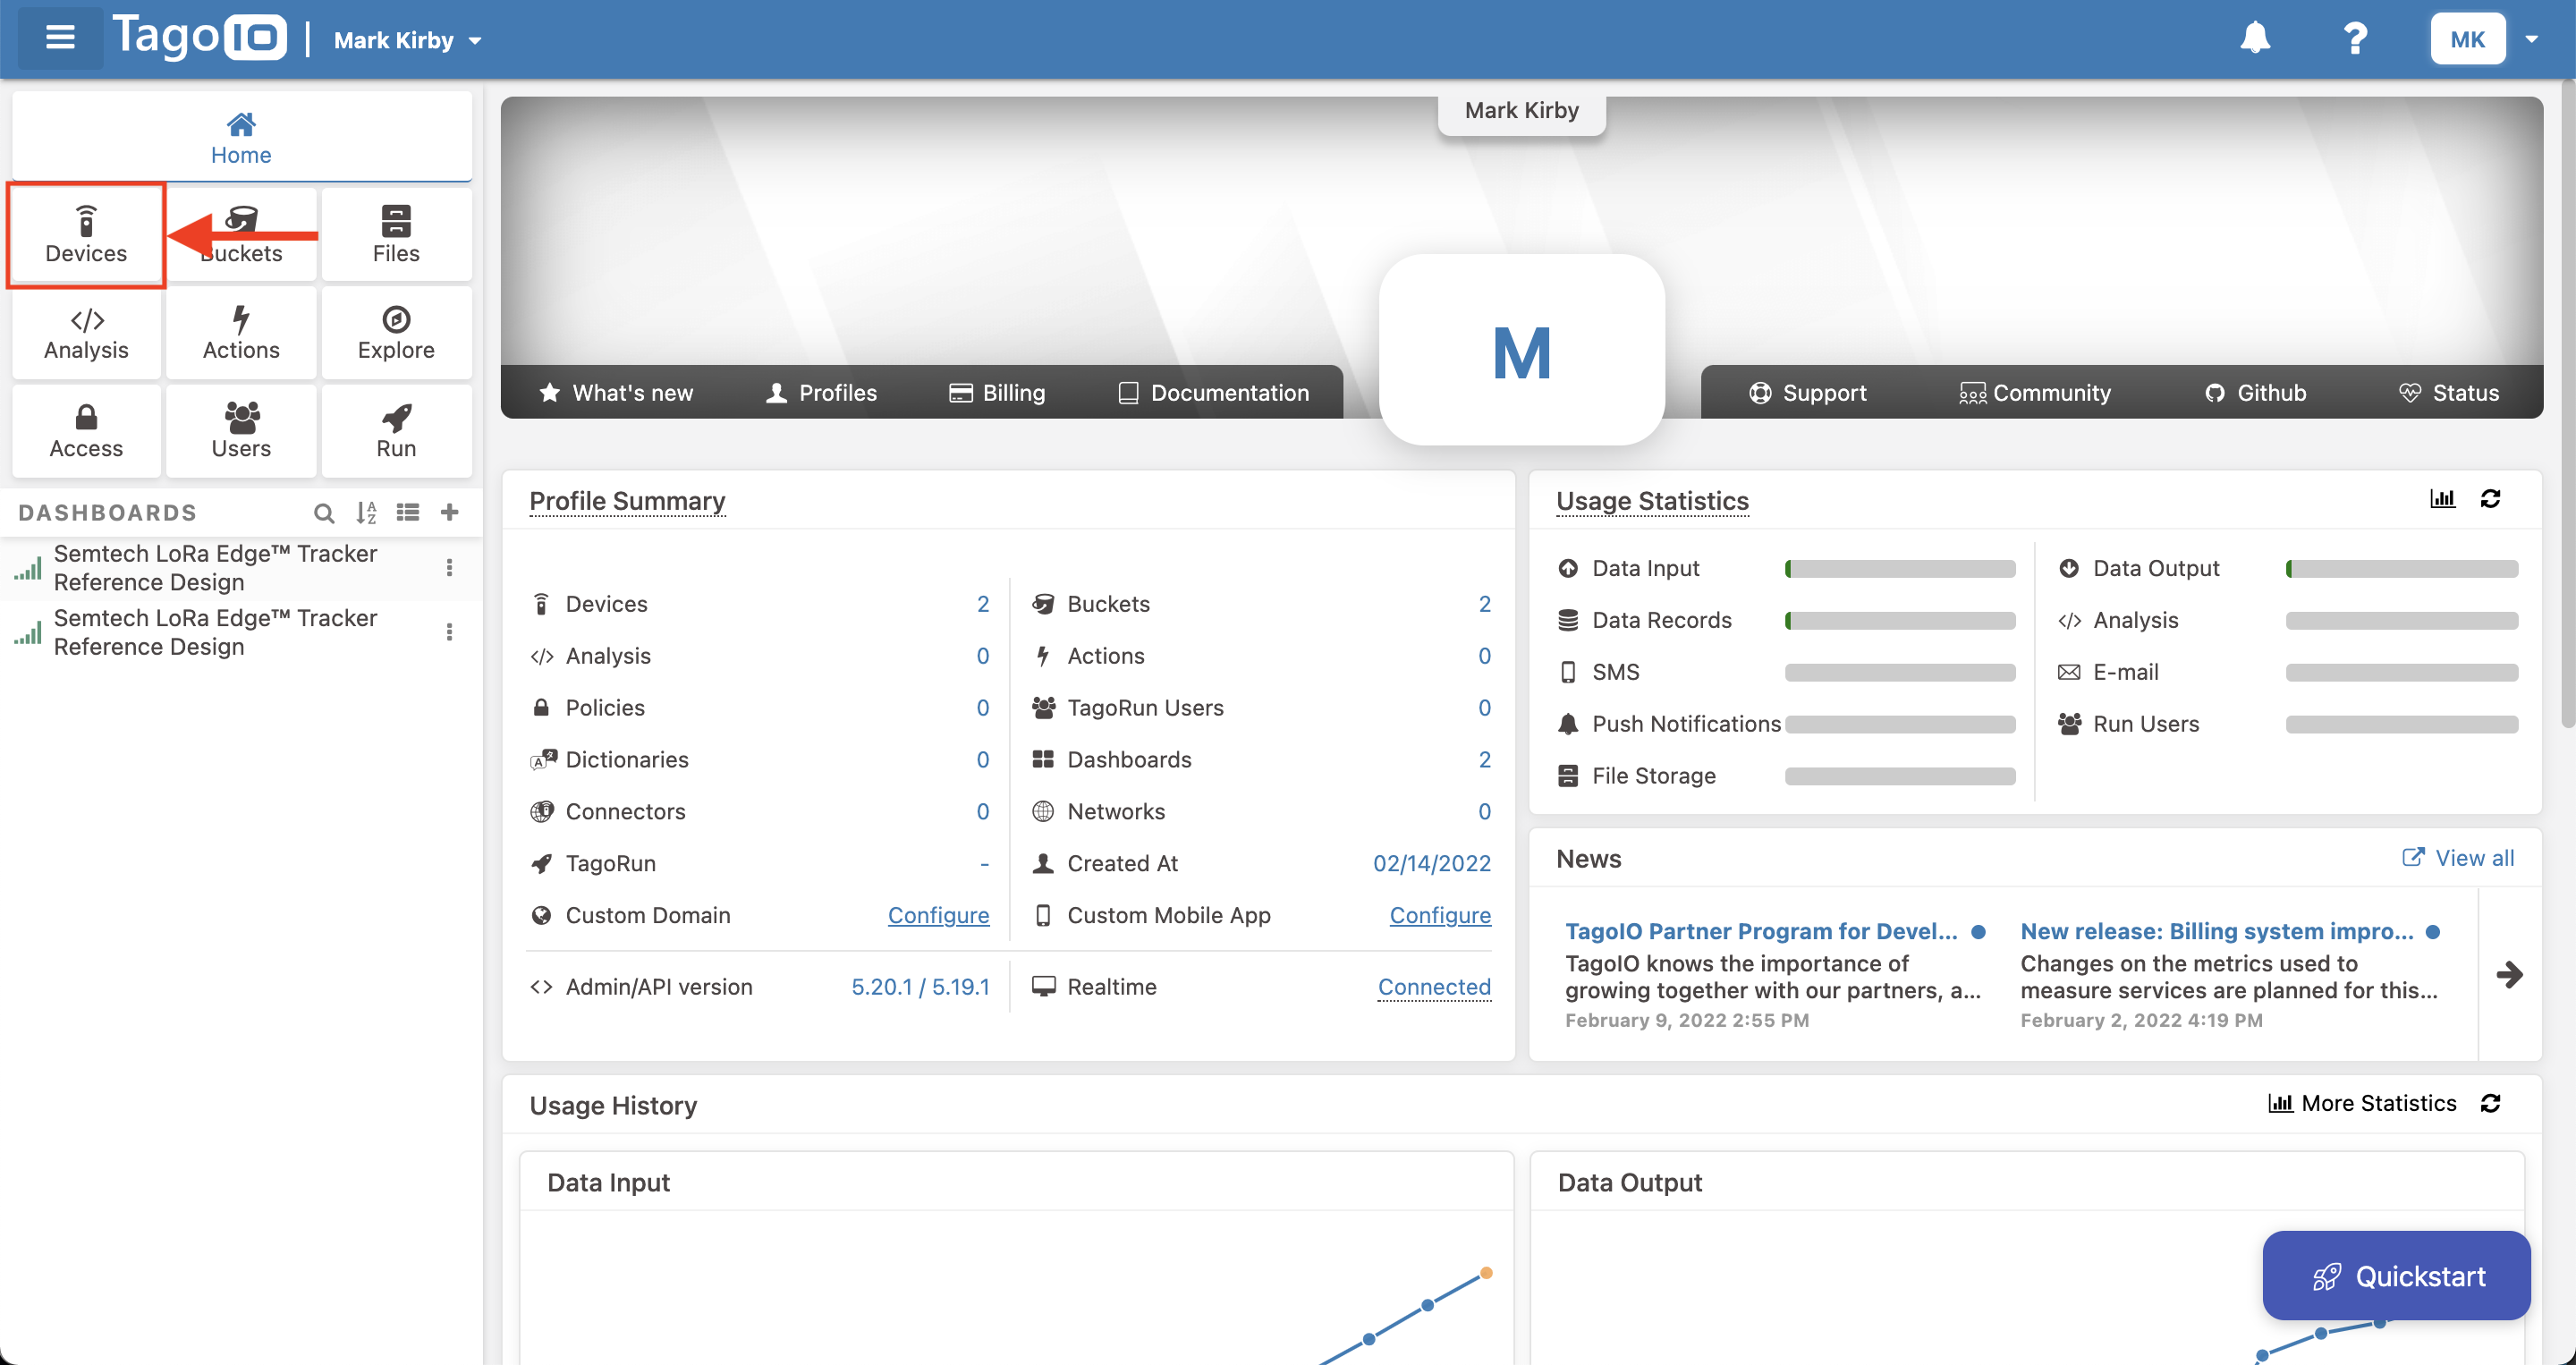
TagoIO Devices button
- On the Devices page, click the Authorization button in the top right corner, or go open the page https://admin.tago.io/devices/authorization.
- Complete the Service Authorization form that displays at the top of the page as follows:
- Name: Enter Actility, or a name of your choosing to identify the ThingPark service.
- Additional Parameter (Optional): Leave this field empty.

Naming the Service Authorization
- Click the blue Generate button.
- The Actility authorization is displayed in the Service Authorization list underneath the form.
- Click the Copy button to copy your authorization token. Paste the token somewhere safe, we later refer to this as the
TAGOIO_ACTILITY_SERVICE_AUTHORIZATION. - Open the ThingPark Community Portal.
- At the main menu, under Connections, select List.
- Select the TagoIO connection you created earlier.
- At the URL field, replace the text YOUR-AUTHORIZATION with the
TAGOIO_ACTILITY_SERVICE_AUTHORIZATIONyou just copied and click the tick icon to save your changes.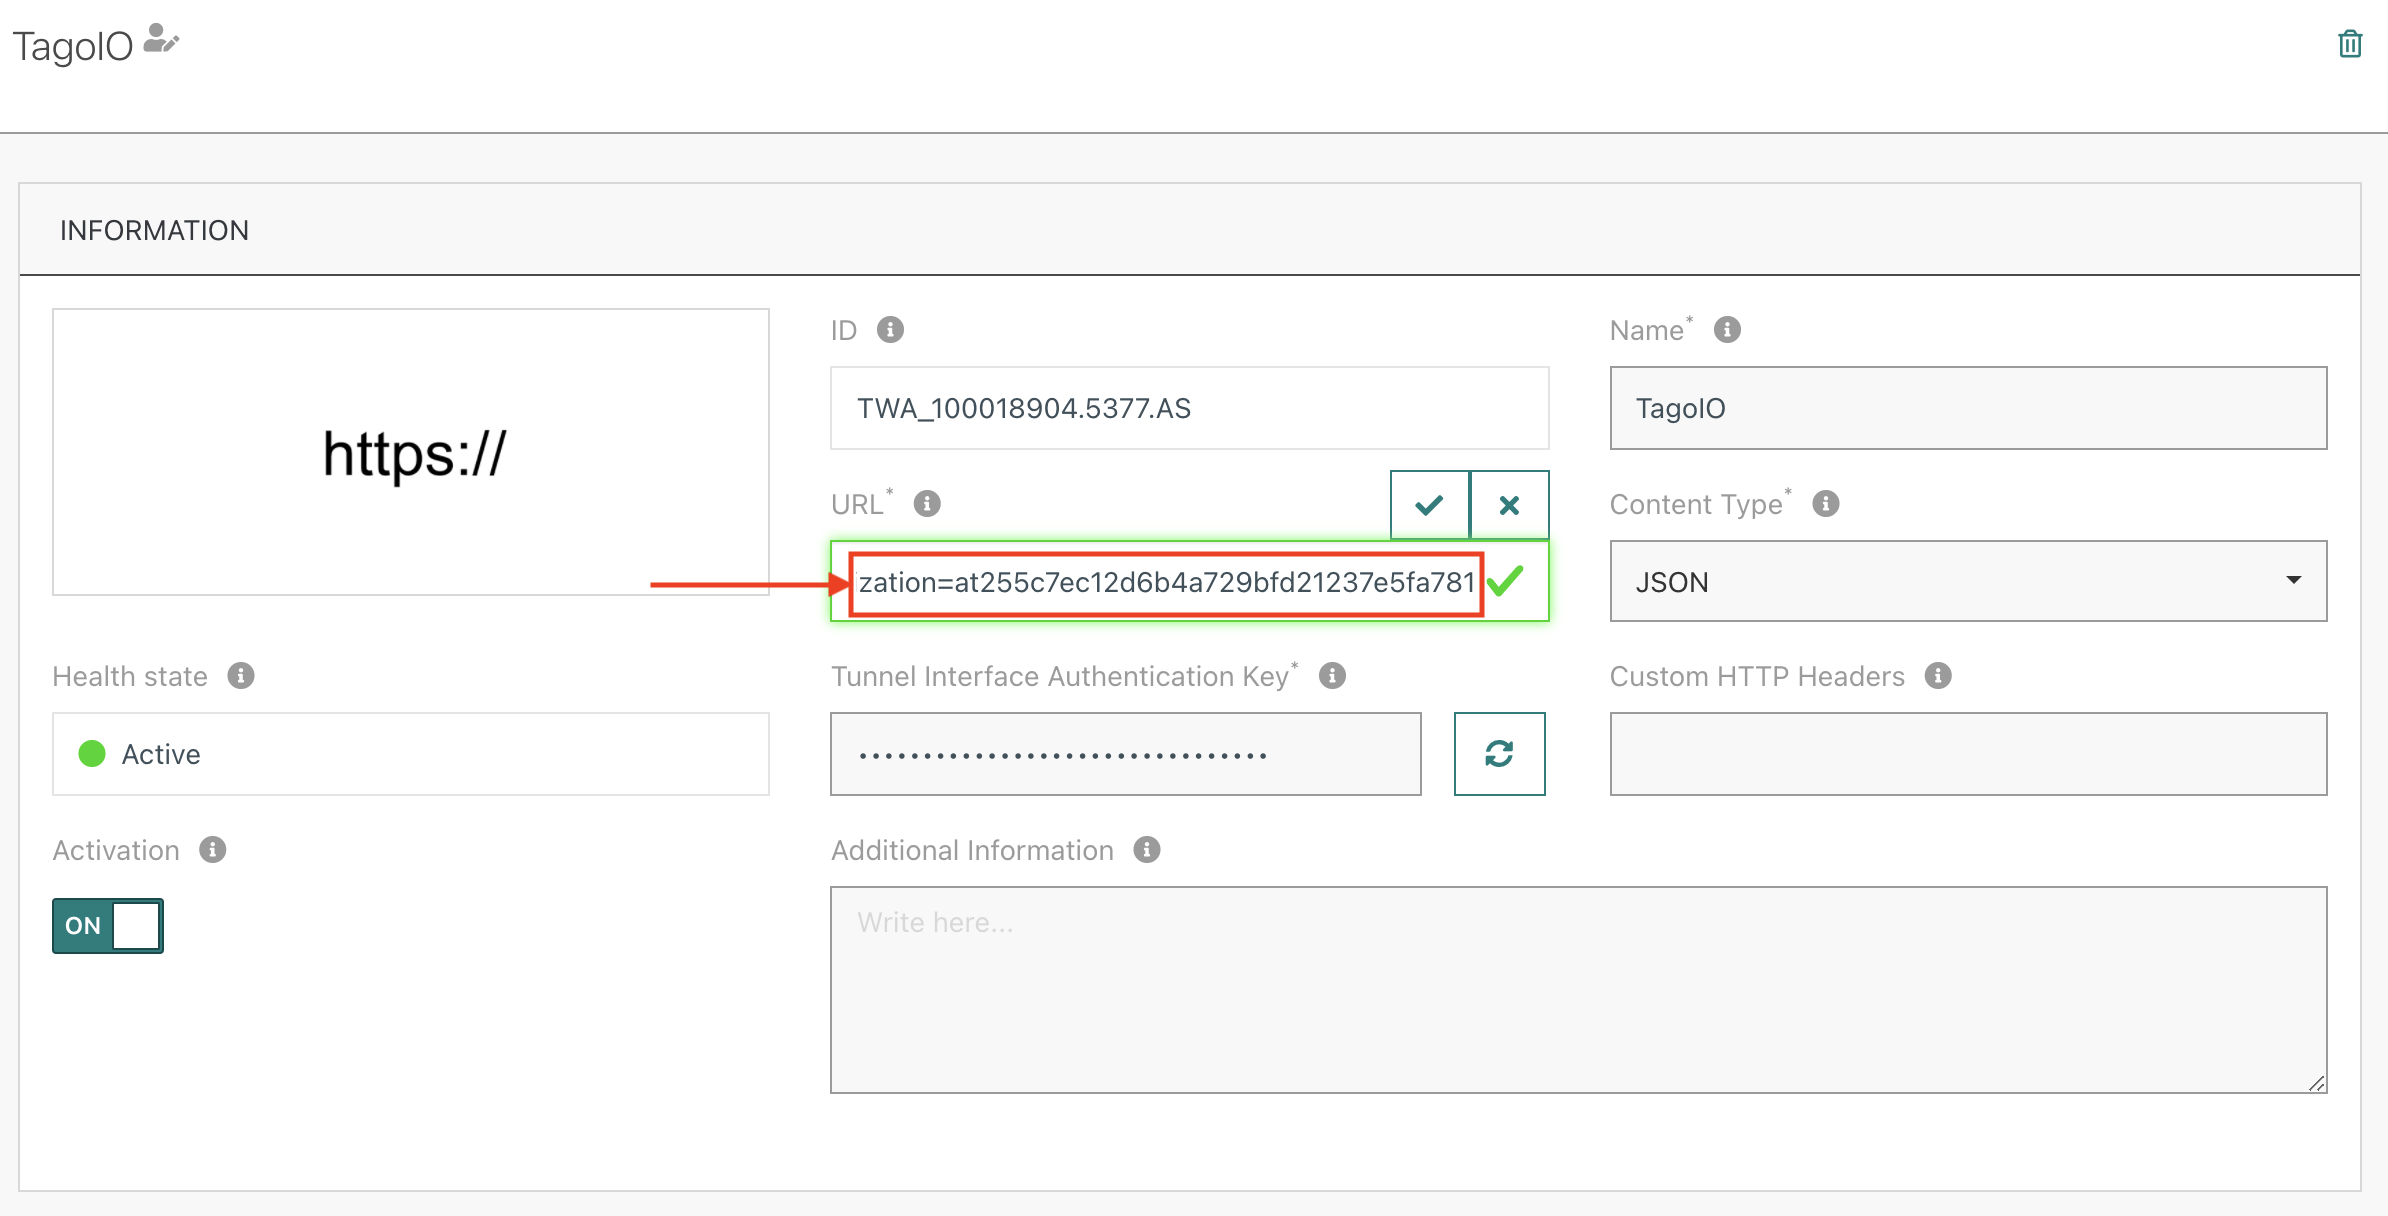
URL field after the YOUR-AUTHORIZATION text is replaced
- Go back to the TagoIO Service Authorization page.
- Click the pencil icon next to your Actility Service Authorization.
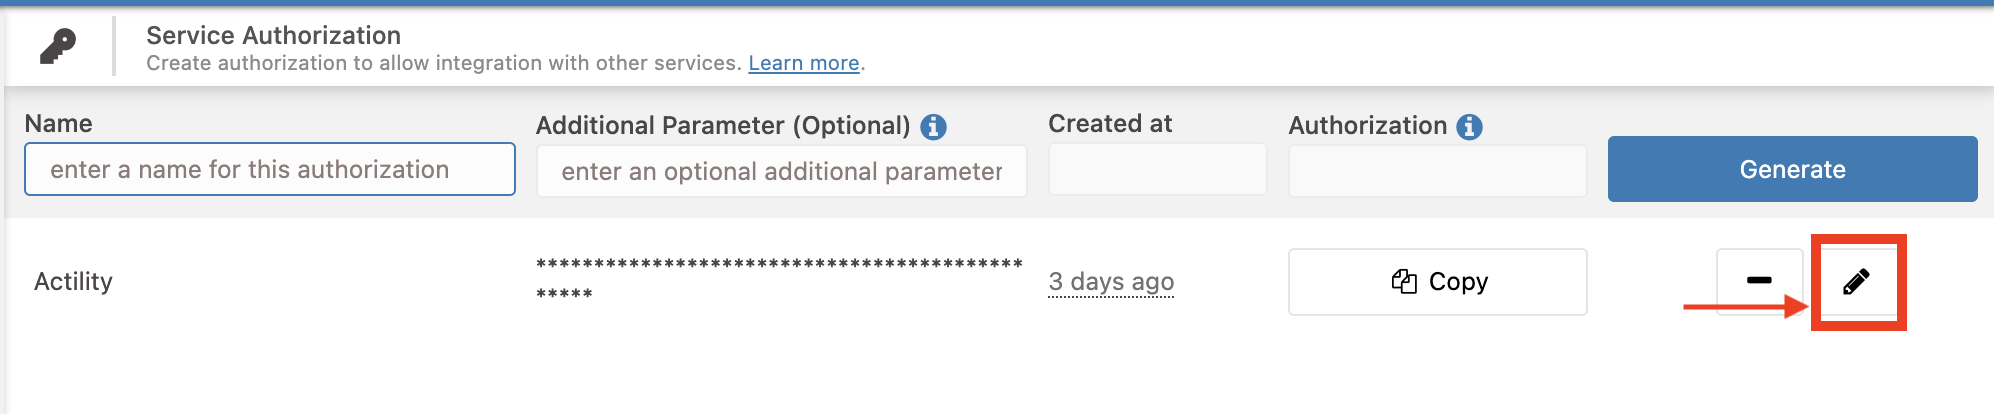
The pencil icon
- The Edit Parameter dialog box displays.
- Paste the
TTCP_CONNECTION_TUNNEL_INTERFACE_AUTHENTICATION_KEYyou saved earlier into the Parameter of Authorization "Actility" field.Note
If you forgot to get a copy of the Tunnel Interface Authentication Key when setting up ThingPark, you can create a new one:
- In a new tab or window, open the ThingPark Community Portal.
- At the main menu, under Connections, select List and select the TagoIO connection you created earlier.
- Click the Regenerate button next to the Tunnel Interface Authentication Key field.
- Highlight and copy the now-visible key.
- Click the checkmark button to save the key.
- You can now return to the TagoIO Service Authorization page, and paste the key into the Edit Parameter dialog box.
- Click the Confirm change button to update the authorization parameter.
Now that you have created your account and created a link between the Actility and TagoIO services, you will not need to repeat those steps.
Add the Tracking Devices to TagoIO
In this section we show you how to create (add) your device in TagoIO. Repeat these steps for each device in your kit.
- Go to your Devices page at TagoIO (https://admin.tago.io/devices).
- If this is the first device you are adding, proceed to the next step. Otherwise, Click Add Device.
- Select LoRaWAN Actility in the Networks sidebar.
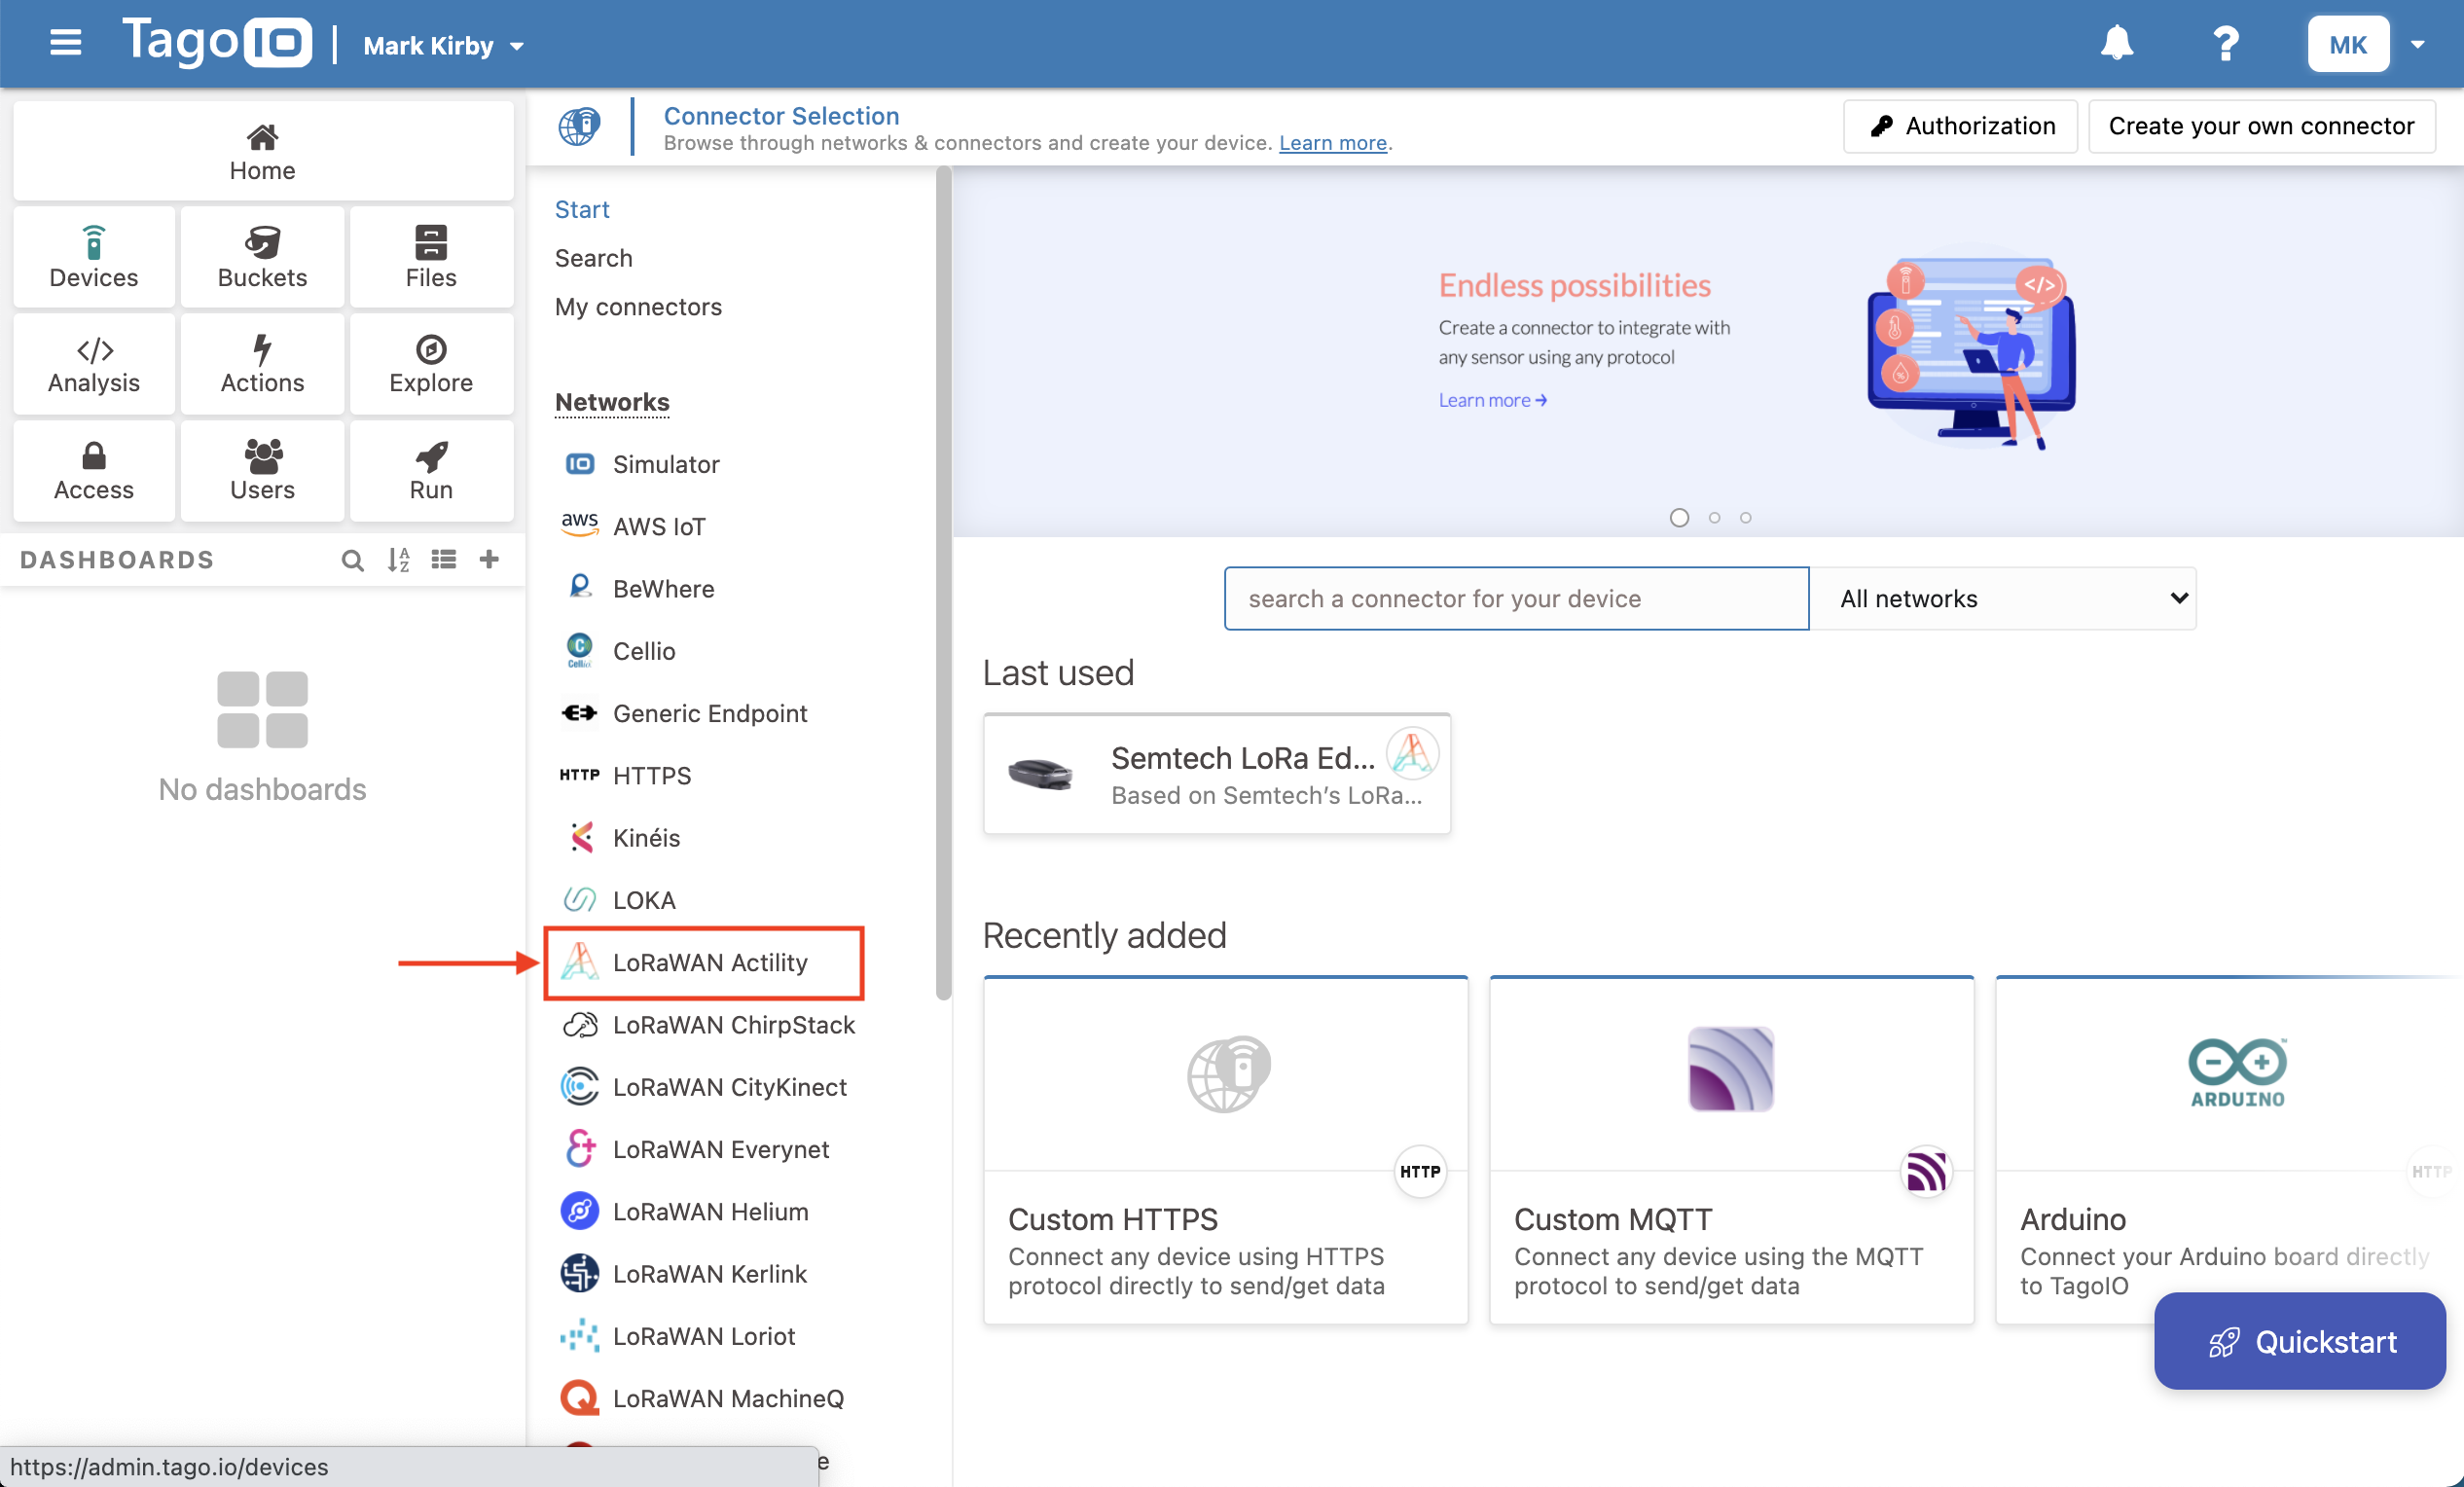
The LoRaWAN Actility item in the Networks sidebar
- Enter Semtech into the search a connector for your device field.
- Select the Semtech LoRa Edge™ Tracker Reference Design device.
- Complete the form as follows:
- Device Name: Enter a name for your device.
- Device EUI: Enter the DevEUI supplied in your Kit.
- DAS Token: Paste the Modem & Geolocation Services Token (
MGS_TOKEN) token you saved earlier.Note
If you forgot to get a copy of a Modem & Geolocation Services Token when setting up the LoRa Cloud™ Services, you can copy one now from the LoRa Cloud™ Portal, selecting Modem & Geolocation Services, MANAGE TOKENS, and selecting the Copy button underneath one of the tokens.
- Click Create my Device.
- The All done! message displays. Click Continue to proceed.
- The Install the dashboard template screen displays. Click on the link to open the installation page.
- Click Install Template in the dialog box that displays.
- In the Associate Your Devices screen, click the select a device fitting the description dropdown and select the name of the device you just created.
- Click on Confirm associations.
- Your new dashboard is displayed. No data will be shown yet. You will find a link to this dashboard in the sidebar.
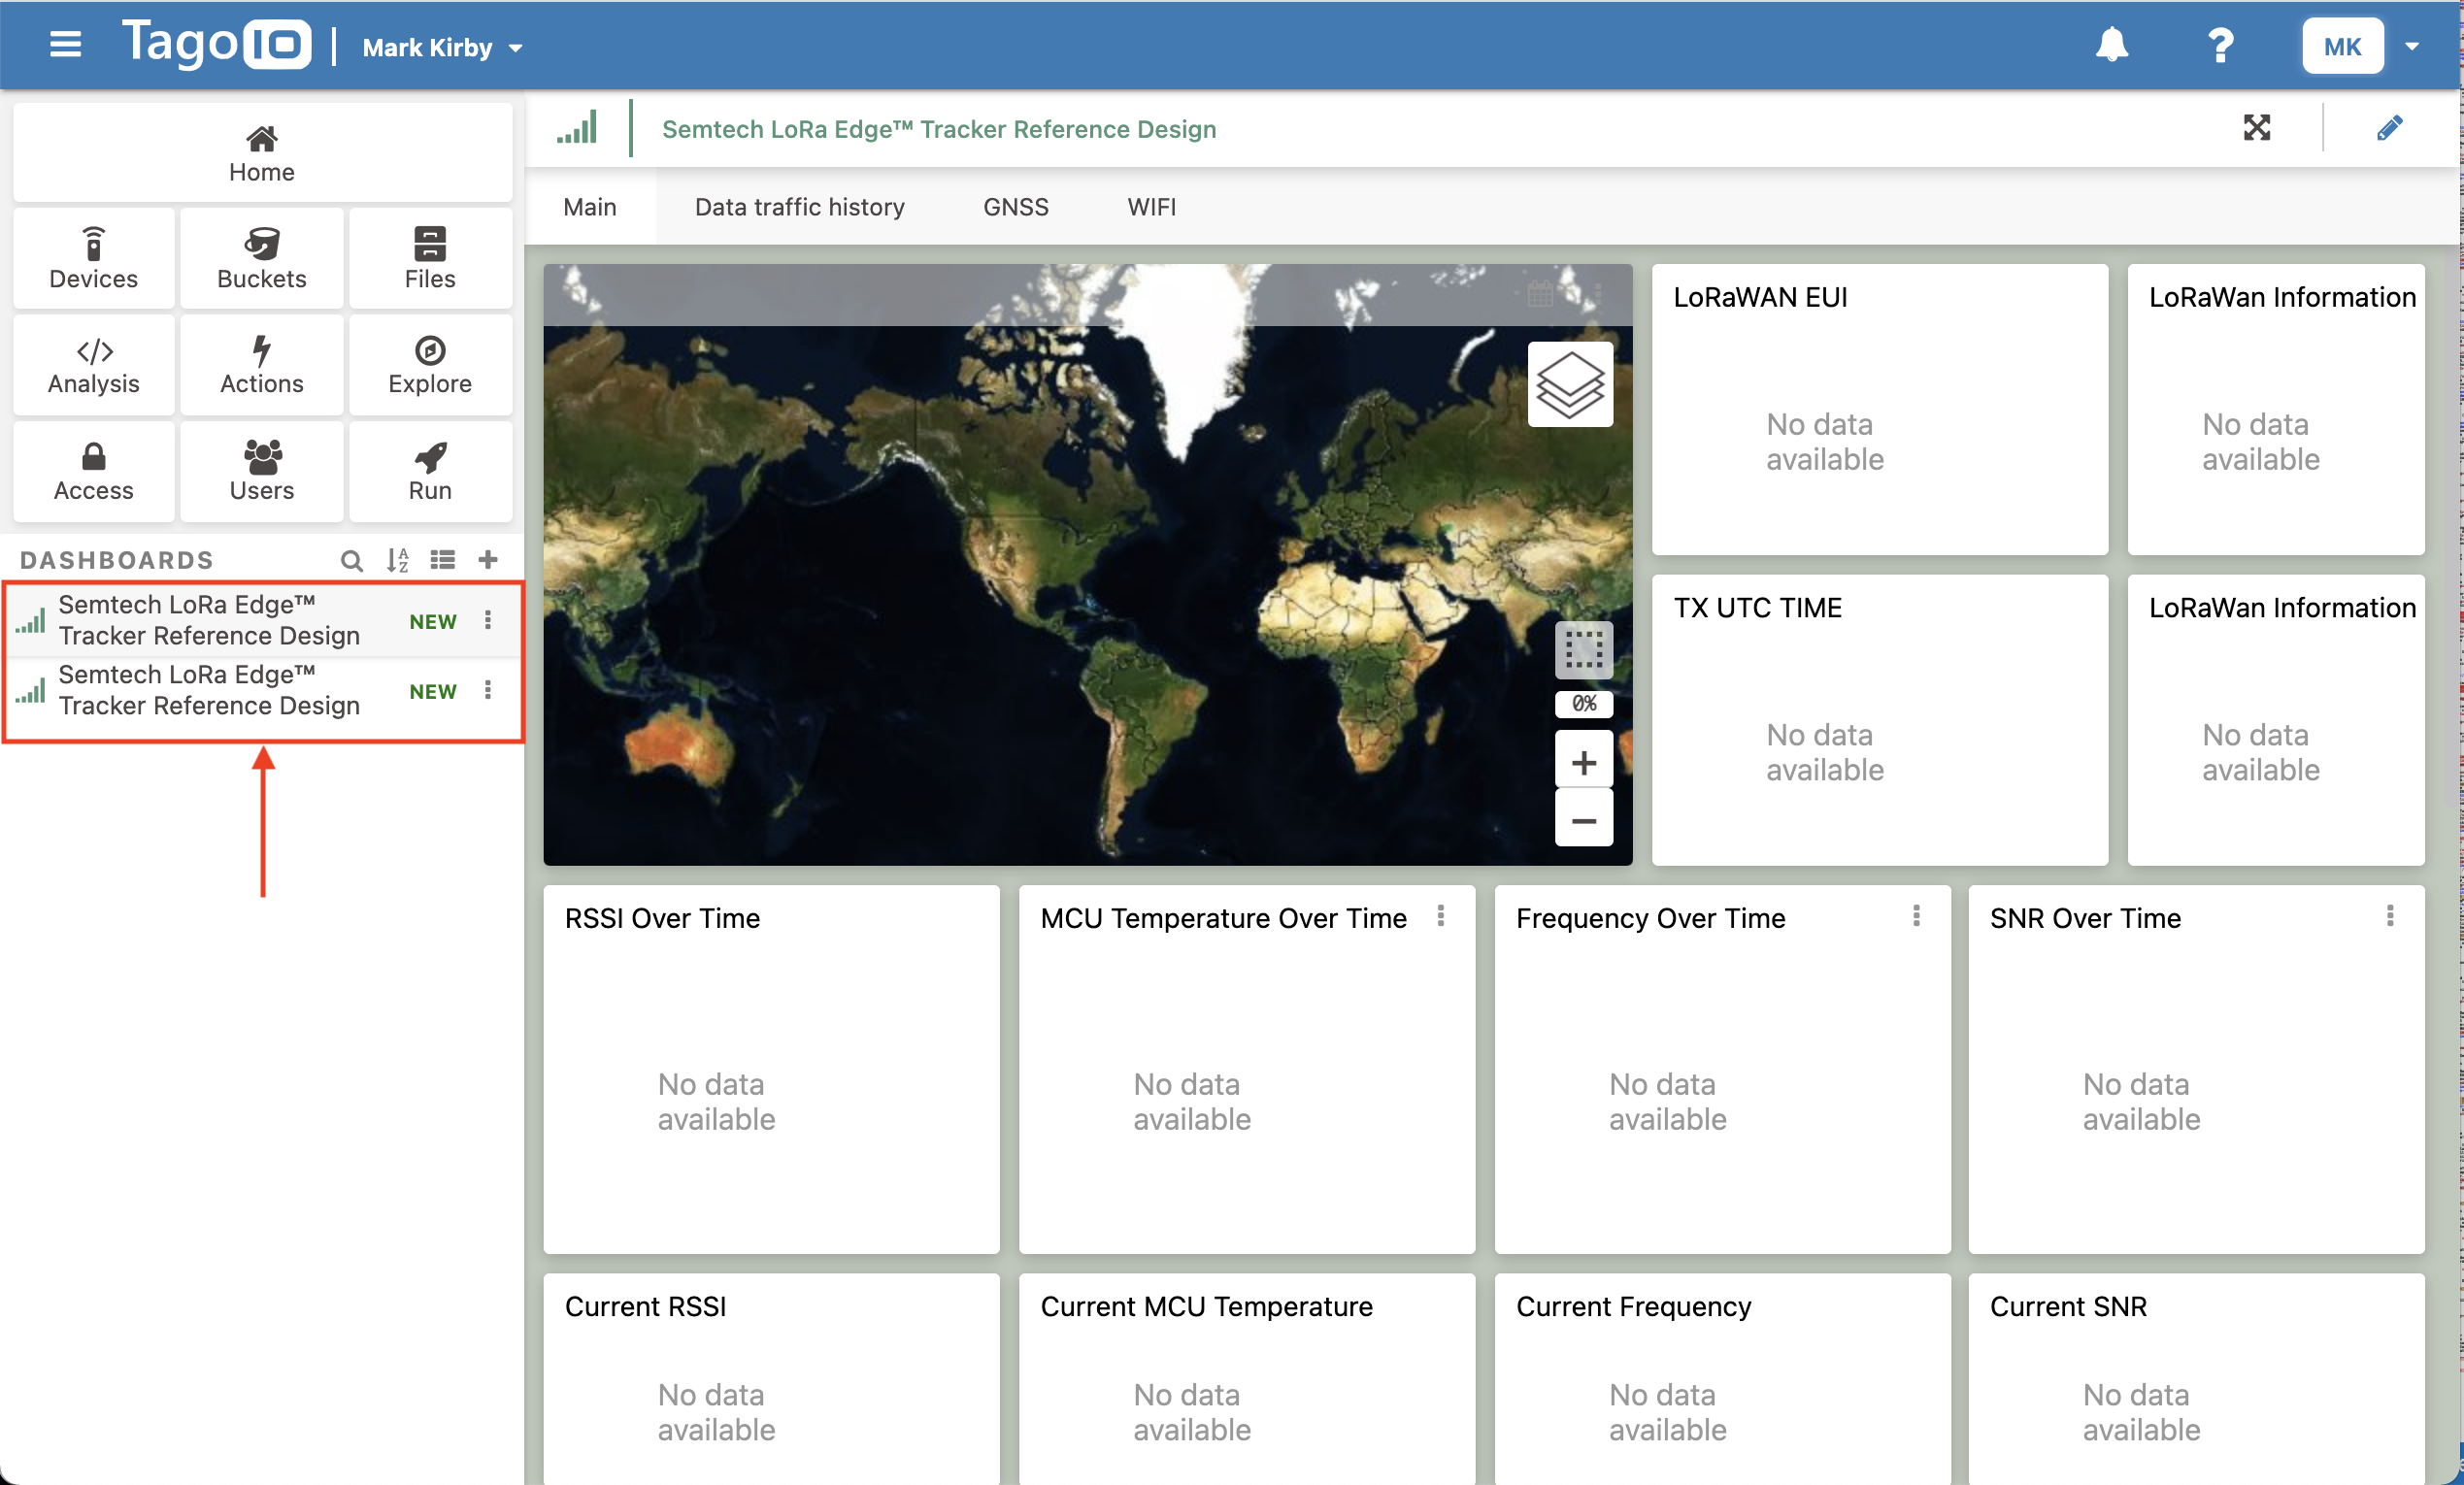
Location of the Sidebar on the TagoIO Dashboard View
Using the TagoIO Web Dashboard
The Dashboard for the tracking devices has four modes:
- Main
- Data traffic history
- GNSS
- Wi-Fi
The Main screen is the map and device information. The Data traffic history shows the latest traffic to and from the Modem & Geolocation Services, showing status messages on the service. The GNSS page shows the latest GNSS solutions and statistics. The Wi-Fi page shows the latest Wi-Fi location history and its statistics.

Dashboard modes